
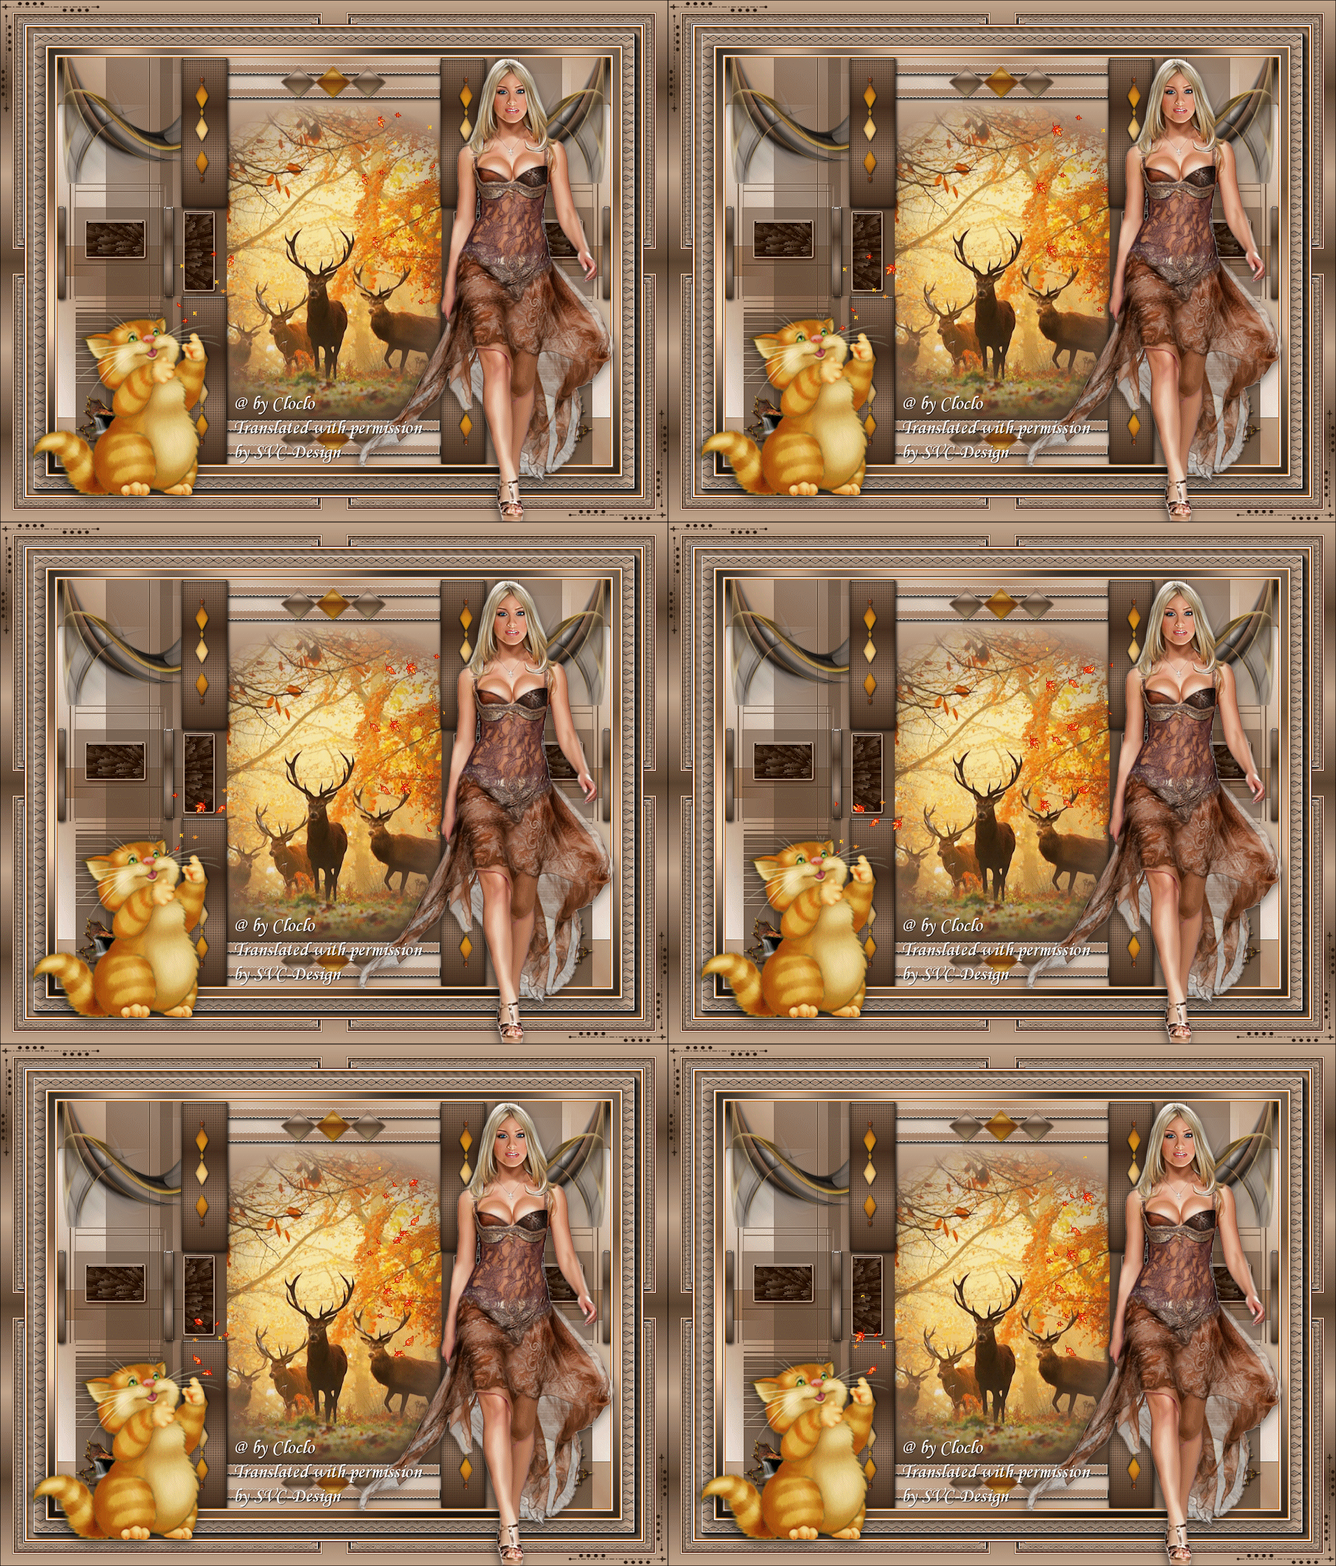
This lesson is made with PSPX9
But is good with other versions.
© by SvC-Design

Materialen Download :
Here
******************************************************************
Materials:
alpha_chaleur_d_automne.pspimage
chat.png
coin Cloclo.png
deco Cloclo.png
deco Cloclo2.png
deco Cloclo3.png
deco Cloclo4.png
deco Cloclo5.png
femme.png
feuilles_Cloclo.gif
feuilles_Cloclo1.gif
fond_Cloclo.jpg
misted Cloclo.png
misted Cloclo1.png
misted Cloclo2.png
Monaiekje mask.jpg
Preset_Glass_Cloclo.f1s
Preset_Shadow_Cloclo.f1s
Watermark_Pour tuto.png
******************************************************************
Plugin:
Plugins - <I.C.NET Software> - Krusty's Fx vol II 1.0 - Pattern Generator P [Flower]
Plugins - Alien Skin Eye Candy 5 - Glass
Plugins - Adjust - Variations
Plugins - Graphics plus - Cross Shadow
Plugins - AAA FRAME - FOTO FRAME
Plugins - Alien Skin Eye Candy 5 - Impact Perspective Shadow
Plugins - Graphics plus - Quick Tile I - default
******************************************************************
color palette
:

******************************************************************
methode
When using other tubes and colors, the mixing mode and / or layer coverage may differ
******************************************************************
General Preparations:
First install your filters for your PSP!
Masks: Save to your mask folder in PSP, unless noted otherwise
Texture & Pattern: Save to your Texture Folder in PSP
Selections: Save to your folder Selections in PSP
Open your tubes in PSP
******************************************************************
We will start - Have fun!
Remember to save your work on a regular basis
******************************************************************
1.
In the Styles and Textures palette
Foreground color 1
Background color 3
Open the autumn_heats alpha channel
Duplicate window
Close original
Rename raster 1
2.
Selections - Select all
Open fond_Cloclo.jpg
Edit - Copy
Edit - Paste into selection
Selection - Select None
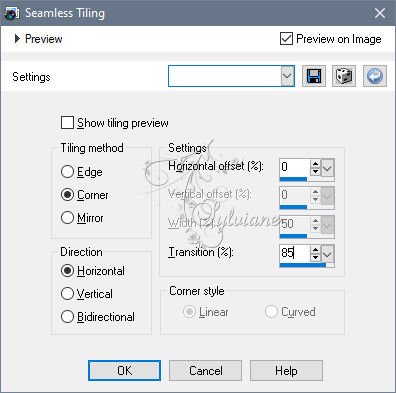
Effects - Image Effects - Seamless Mosaic
Layers - New raster layer
Fill with color 2
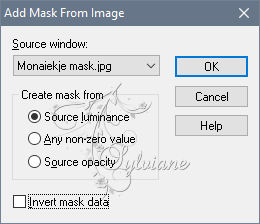
Open the mask Monaiekje mask
Layers - New Mask Layer - From Image - Monaiekje mask.jpg
Adjust – scharpness – scharpen
Layers - Merge - Merge Group
Activate selection tool (Press K on your keyboard)
And enter the following parameters:
Pos X : -238 – Pos Y : 0
Press M.
Layers - Duplicate
Image - Mirror – mirror Horizontal
Layers – merge – merge down
3.
Layers - New raster layer
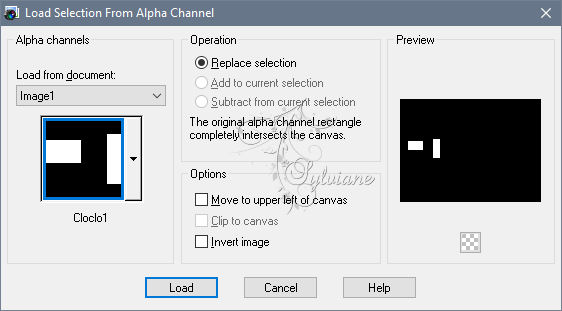
Selections - Load / Save - Load selection from Alpha Channel - Cloclo1
Plugins - <I.C.NET Software> - Krusty's Fx vol II 1.0 - Pattern Generator P [Flower]
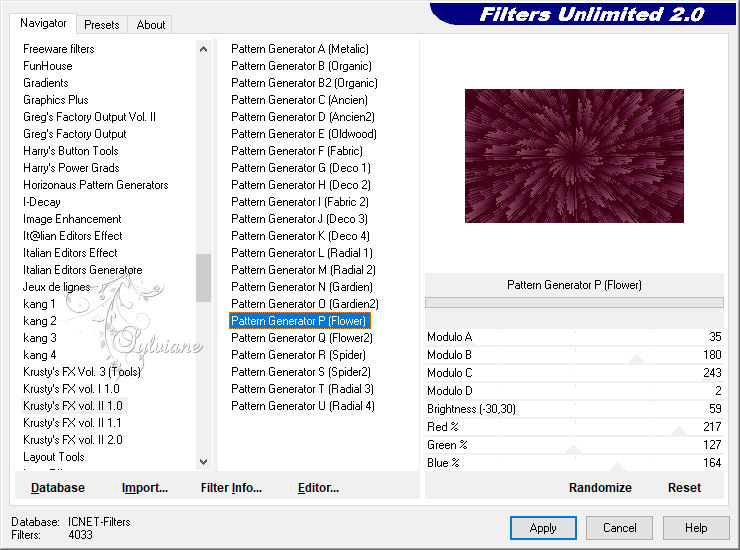
Plugins - Alien Skin Eye Candy 5 - Glass - Preset_Glass_Cloclo
Blend Mode: Luminance (legacy)
Selections - modify - select selection borders
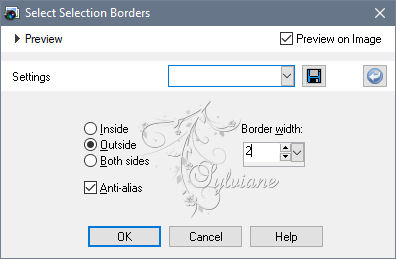
Fill with color 1
Selection - Select None
Layers - Duplicate
Image - Mirror – mirror Horizontal
Layers – merge – merge down
Effects - 3D Effects - Drop Shadow / 2/2/75/5 / Black
Layer - New raster layer
Selections - Load / Save - Load selection from Alpha Channel - Cloclo2
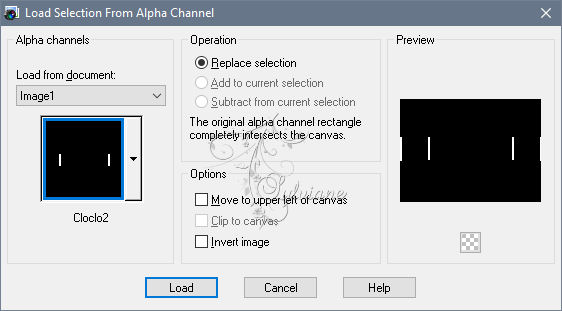
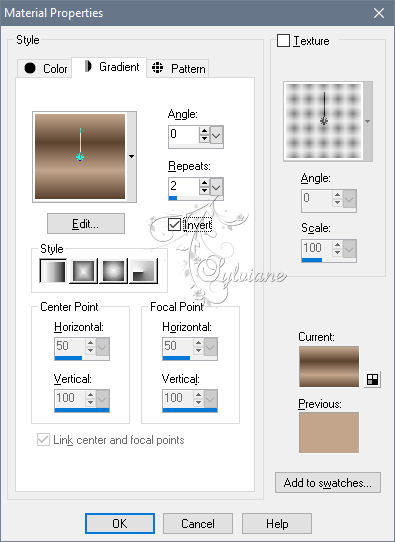
Fill with the Linear
Color gradient 1 in the foreground and 2 in the background
Effects - Edge Effects - Enhance
Plugins - Alien Skin Eye Candy 5 - Glass - Preset_Glass_Cloclo
Selection - Select None
Effects - 3D Effects - Drop Shadow / 2/2/75/5 / Black
4.
Layer - New raster layer
Selections - Load / Save - Load selection from Alpha Channel - Cloclo3
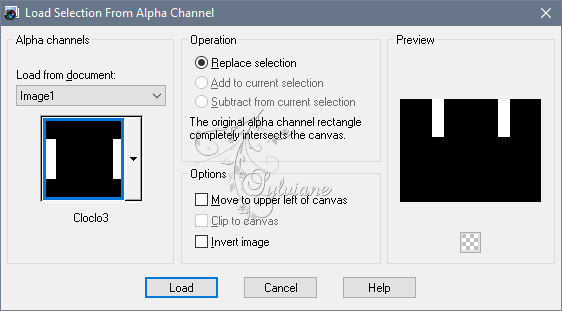
Fill with Linear gradient / It is in memory
Effects – texture effects - wave
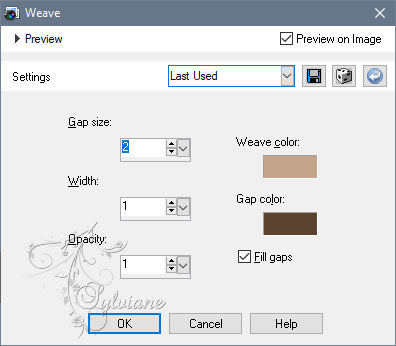
Plugins - Adjust - Variations - Click once on Original and once on Darker
Plugins - Alien Skin Eye Candy 5 - Glass - Preset_Glass_Cloclo
Selection - Select None
Effects - 3D Effects - Drop Shadow / 2/2/75/5 / Black
Repeat this step / But with selection 4
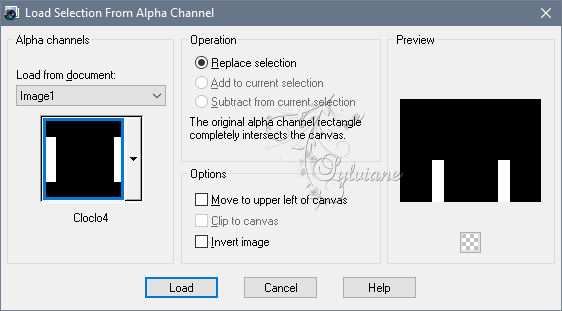
5.
activate Group raster1
Selections - Load / Save - Load selection from Alpha Channel - Cloclo5
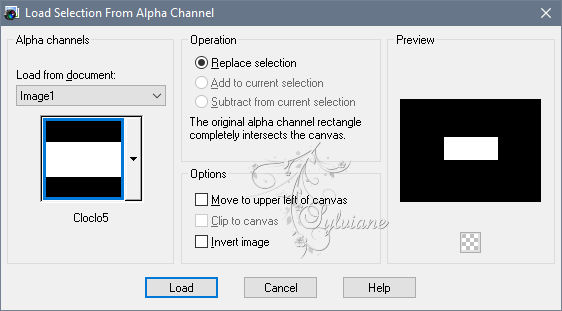
Edit - Clear
Selection - Select None
Stay on this layer
Layers - New raster layer
Selections - Load / Save - Load selection from Alpha Channel - Cloclo6
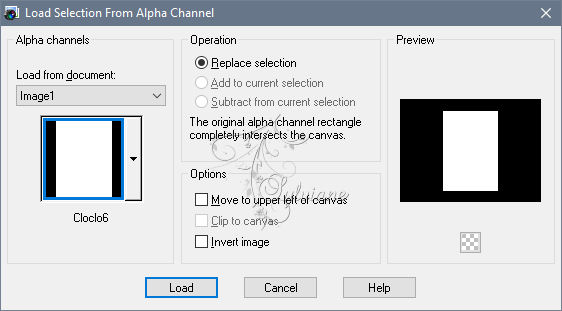
Fill with the starting gradient it is in memory
Open the misted tube Cloclo1
Edit - Copy
Edit - Paste as new layer
Do not move
Selections - Invert
Edit - Clear
Selections - Invert
Layers – merge – merge down
Effects - 3D Effects - Drop Shadow / 2/2/75/5 / Black
Selection - Select None
Layers – arrange – move down
Stay on this layer
Open deco Cloclo5.png
Edit - Copy
Edit - Paste as new layer
Do not move
Layers – merge – merge down
Effects - 3D Effects - Drop Shadow / 2/2/75/5 / Black
Layers – arrange – move down
Go back to the top layer
6.
Open deco Cloclo.png
Edit - Copy
Edit - Paste as new layer
Objects - Align - Top
Open deco Cloclo2.png
Edit - Copy
Edit - Paste as new layer
Do not move
Open deco Cloclo3.png
Edit - Copy
Edit - Paste as new layer
Do not move
Open the deco tube Clocol 4
Edit - Copy
Edit - Paste as new layer
Objects - Align - Bottom
With the magic wand / Tolerance 0 / Select the inside of the right sheet
Open misted Cloclo.png
Edit - Copy
Edit - paste in the selection
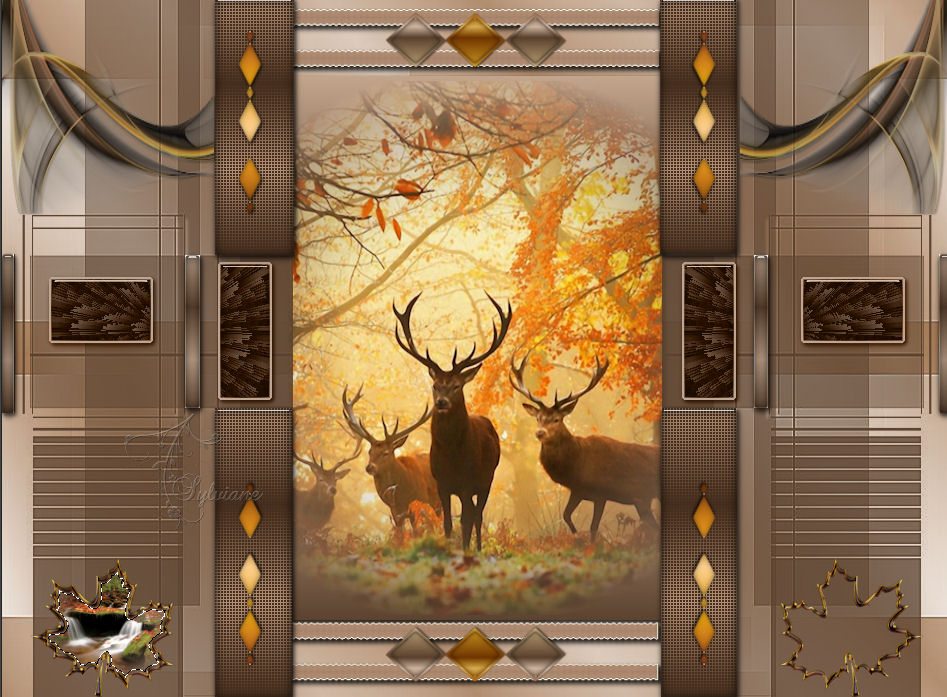
Selection - Select None
Open misted Cloclo2.png
Edit - Copy
With the magic wand / Tolerence0 / Click in the left sheet
Edit - Paste in Selection
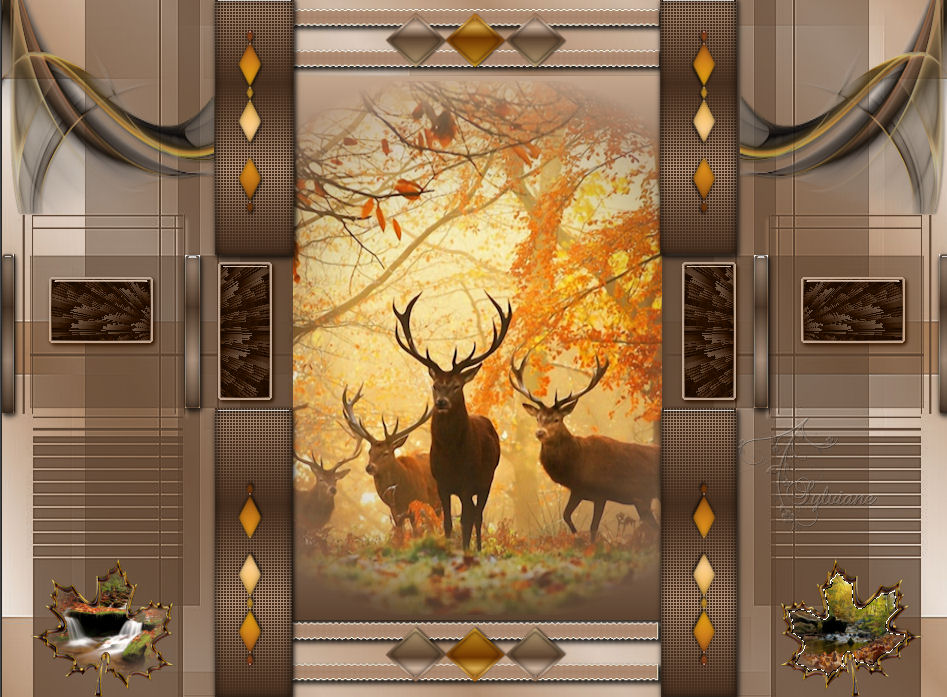
Selections - Select None
Effects - 3D Effects - Drop Shadow / 1/1/75/5 / Black
7.
Images - Add a border - 2 pixels - Color 3
Images - Add a border - 2 pixels - White color
Images - Add a border - 2 pixels - Color 2
Selection - Select all
Image - Add a border - 10 pixels - White color
Selections - Invert
Fill with starting gradient
Plugins - Graphics plus - Cross Shadow - Default
Selections - Select nothing
Images - Add a border - 2 pixels - Color 3
Images - Add a border - 2 pixels - White color
Images - Add a border - 2 pixels - Color 2
Selection - Select all
Image - Add a border - 30 pixels - White color
Selections - Invert
Fill with starting gradient
Effects - Reflection Effects - Pattern
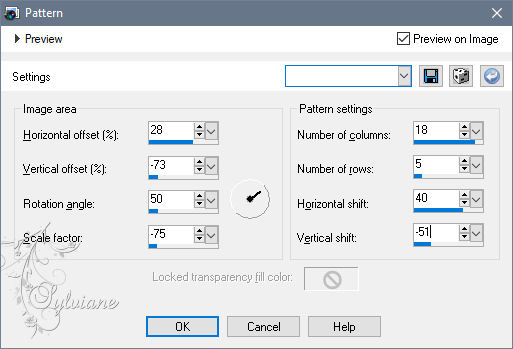
Plugins - AAA FRAME - FOTO FRAME
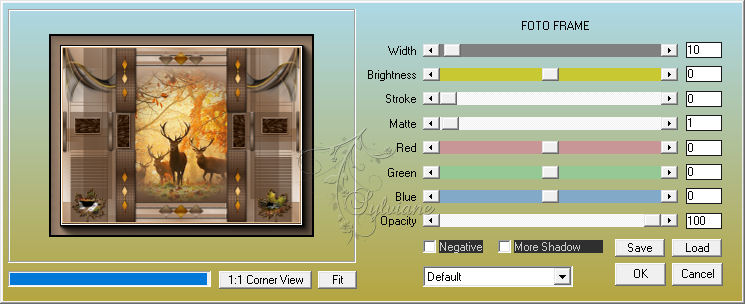
Selections - Invert
Plugins - Alien Skin Eye Candy 5 - Impact Perspective Shadow - Preset_Shadow_Cloclo
Selection - Select None
8.
Images - Add a border - 2 pixels - Color 3
Images - Add a border - 2 pixels - White color
Images - Add a border - 2 pixels - Color 2
Selection - Select all
Image - Add a border of 40 pixels - White color
Selections - Invert
Fill from the starting gradient
Plugins - Graphics plus - Quick Tile I - default
Selection - Select None
Open femme.png
Edit - Copy
Edit - Paste as new layer
Place right
See final
Plugins - Alien Skin Eye Candy 5 - Impact Perspective Shadow - Shadow_Cloclo
Open the cat tube
Edit - Copy
Edit - Paste as new layer
Place bottom left / See final
Plugins - Alien Skin Eye Candy 5 - Impact Perspective Chadow - Shadow_Cloclo
Images - Add a border - 1 pixel - Color black
Put my Watermark
Open coin Cloclo.png
Edit - Copy
Edit - Paste as new layer
Do not move
Layer – merge – merge all (flatten)
Sign your work
Put the copyright if paying tube
Image / Resize to 1000 pixels wide
9.
If you don't want to do animation / Save as JPG
Otherwise we continue / For animation
Edit - Copy
Open Animation Shop
Edit - Paste as a new image
Open feuilles_Cloclo.gif
There are 6 layers
You position on the first
Edit - Select All
Go back to your tag
Duplicate it so as to have 6 layers
You position on the first
Edit select all
E drag the first layer of the sheets to the desired location
Go back to the sheets
At the top of the bar below the effect
Click on the small arrow to cancel
Drag a second time onto your tag
Repeat the operation 3 or 4 times
Then open feuilles_Cloclo1.gif
Repeat the same operation
But only once above the cat
If you are satisfied
Save as gif
Back
Copyright Translation © 2020 by SvC-Design